Audio Recording
If you want to record using a microphone you should connect it to your sound device's Mic input. Keyboards, mic preamps or mixer outputs should be connected to the Line input.
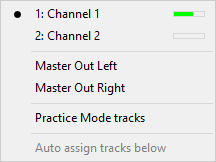
Input assignment
 |
Recording Levels
The Level Meter starts working upon clicking the track's Rec button (it turns red). You can now set the recording level. The way this can be done this depends on your sound device. A Recording Level Fader appears next to the Input button if the sound device supports this. The Input button itself may take you to per-channel level settings if the device supports this. If the sound device comes with its own control panel you can use that. If you have a mic preamp or a hardware mixer it's more convenient to use this to set the recording level (set the sound device's level to its maximum value).
The recording level is OK if the meter reaches the yellow section during signal peaks.
Note: driving the recording level meters into the red section is definitely a bad thing in digital audio.
Under the hood
The level meters read 0.1% above the actual recording level while recording in order to make it possible for the first red segment to light when reaching the clipping level. Otherwise no red segment would ever light as the Audio In Device cannot output data above its clipping level.
Live Multitrack Recording
Note: these features are available in the Pro edition only.The Pro edition offers two features that make live multitrack recording easier:
- The Add Audio Track window has a '#' box which holds the number of tracks to create, so you can add multiple tracks in one go. The box appears automatically if the audio device has at least 4 input channels. You can press Ctrl+N to make it appear anyway (this also works in the Add MIDI Track window).
- The Song menu's New window has a Template box. The "Identical to current" template creates an empty copy of the current song. A new folder will be created, with new audio/MIDI files and a new song file. This feature can be used to record another take of a performance.
Tip: you can toggle all Rec buttons in one go by clicking one while the Ctrl key (Windows) / Command key (Mac) is pressed.
Record Master Out
Note: you can use the Mix Down menu's 'Mix down to audio file' option instead.
An audio track will record the output of the Master section (or simply the output if the Master section has been removed) if the Master Out option is selected in the Input channel selector. This feature can be used to mix the song to down stereo (see mastering).
This feature can also be used to 'bounce' tracks in order to reduce the number of tracks used by the song. For example: a five track backing vocal group can be bounced to a single track by recording the five tracks to a new track (temporarily turn of all other tracks, and bypass any effects in the Master section). Having done this, the five original tracks can be turned off (using their Play buttons) and the new track can be used instead.
In a similar way this option can be used to 'freeze' a track that uses effects that require a lot of processing power. The new (audio) track will include the effects, thereby freeing up the processing power used by them.
Recording Practice Mode tracks
The input channel selector features a 'Practice Mode tracks' option. Using this option you can record a track which is in 'manual practice mode' to an audio track. You can use this if you want to play an instrument plugin and record the performance as audio rather than MIDI, for example.You can set it up like this:
- Doubleclick a track's Play button to switch it to manual practice mode.
- If it's an audio track: engage the Mon button to switch on Soft Monitoring.
- Add an audio track, set its input to 'Practice Mode tracks' and engage its Rec button.
- Now you can hear it's working and you can start the transport.
The audio track that's recording isn't 'soft monitored' (you'd hear the practice mode track twice if it did).
Note: this doesn't work with VariSpeed.