Touch
Note: touchscreen support is available for Windows onlyMultitrackStudio features a touchscreen mode that makes the program easy to use with tablets, convertible notebooks, and touchscreen monitors. You can interact with the knobs on the screen directly, without having to find and move the mouse first.
Quickstart: 3 tips
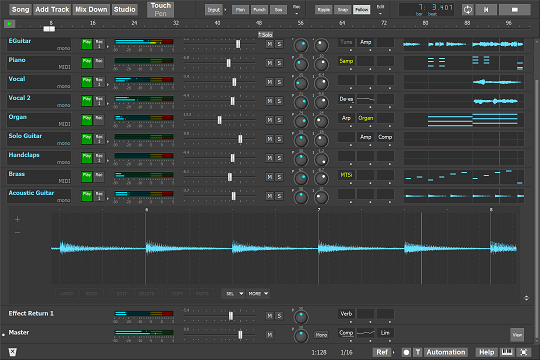
1: Switch to touchscreen mode
 |
In touchscreen mode, some controls are larger to make them easier to use. The transport buttons are an example of this. Controls that don't get visibly larger still respond to a bigger area for ease of use with touch.
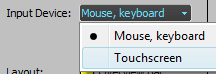
2: Check Windows DPI setting
Touchscreens are hard to use if controls are too small. Traditionally, Windows runs at 96 DPI (DPI = dots per inch). Modern notebook screens can have 150 DPI or more, which makes everything significantly smaller unless you adjust the Windows DPI value accordingly. A MultitrackStudio track measures 9.5 mm in height if the Windows DPI value matches the screen's. It is highly recommended to ensure tracks are not smaller than this. You can increase the DPI value even more if the touchscreen is still difficult to use. If you'd rather not change the Windows DPI setting, you can go to the Studio menu's Preferences window and use the Size setting to scale MultitrackStudio independently of the Windows DPI setting.3: Use full screen mode
It is highly recommended to use full screen mode. The knobs at the top and the bottom bar are much easier to operate this way, and you avoid the risk of touching the "X" button or Windows taskbar accidentally. There is a button in the bottom-right corner of the main window to enter or leave full screen mode.In depth: using user interface elements with touch
Some things work a bit differently with touch compared to using a mouse:Mixer faders
 |
- Place a finger on the fader and move it horizontally. The fader thumb does not move as fast as your finger, allowing for accurate control.
- Tapping the left half moves it down one step, tapping the right half moves it up one step.
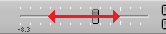
Rotary knobs
 |  |
- Place a finger on the knob and either move it horizontally or make a rotating motion below the knob.
- Tapping the left half moves it down one step, tapping the right half moves it up one step.
Buttons/boxes with right arrows (like the Input button)
 to show menu |
- Place a finger on the button or box and move it horizontally. After moving about half a centimeter, a white area becomes visible, representing the menu that will appear when you lift your finger from the screen.
Up/down buttons
 |
- Place a finger on the button and move it approximately 2 centimeters up or down to increase or decrease the value. If you keep your finger on the screen, the button will continue to increase or decrease the value automatically.
Text boxes
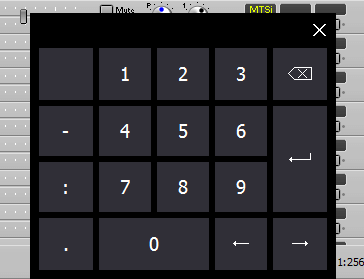 |
- An onscreen keyboard appears when you tap a text box. Use the keyboard's Enter key to confirm the new value, or close the keyboard to cancel.
Effect/Instrument slots
- Press and hold to open the effect/instrument selector for a non-empty slot (keep your finger down for about a second).
- To move a slot, start by moving it horizontally, even if you intend to move it vertically.
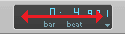
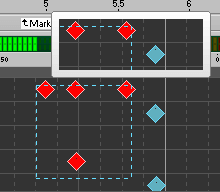
Overview Bar
 |
- Even though markers appear at the bottom, you can (and should) touch them as if they span the full height.
- Use the position counter menu to add or delete markers. (Tap the marker before opening the menu to delete it.)
- You can pull down a marker to open a menu with options (see the "Buttons/boxes with right arrows" paragraph above).
- You can't change the transport position while recording, to avoid accidental changes.
Transport
 |
- Move your finger horizontally over the transport position counter to step through recent start positions (just like pressing Alt+Left/Right Arrow).
Lists with a vertical scrollbar
 |
- Place a finger on the list contents and move it up or down. No need to use the scrollbar.
Text in Comments window and Chords/Lyrics editors.
 |
- An onscreen keyboard appears when you tap the text box.
- If there's a vertical scrollbar, you can scroll by moving your finger up or down directly on the text. No need to use the scrollbar.
- Select text by moving your finger horizontally. Once the editor detects a selection gesture, you can move vertically too.
- With a multi-touch screen, use two-finger pinch gestures to zoom text in or out.
Moving mixer sections
 vertically to drag section |
- To move a single section, place a finger on a track's file name box (or corresponding area in an Effect Return etc.), then move it a few centimeters horizontally before moving vertically. Moving vertically immediately will scroll all mixer sections instead.
Track file history
 |
- When you tap a file, a message box appears so you can choose whether to open it in the current track or in a new one.
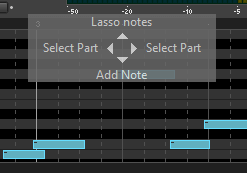
Editors
- The mode buttons in the editor's bottom-left corner aren't available. A mode selector appears when you touch the editor for about half a second (you can adjust this delay in the Preferences window). Move your finger in the desired direction (left, right, up or down) to select an action.
- Selected parts can be moved directly. Touch handles appear near the edges of small items like notes or dots to make them easier to drag. You can also change a note's duration using a touch handle.
- You can scroll an editor horizontally using one finger. Vertical scrolling works too, where applicable. With a multi-touch screen, you can zoom horizontally using two fingers. In the pianoroll, score, and audio editors, you can also zoom vertically using two fingers.
- While adjusting the start or end of a selected part, zoom in by moving your finger down (towards the bottom of the screen). The editor zooms in until you release your finger again. This helps set start/end points precisely without manually zooming.
- When lassoing notes, a copy of the lassoed area appears above the editor so you can see what your finger is covering.
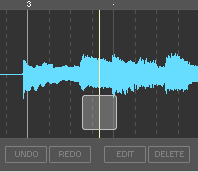
- A semi-transparent "touchthumb" appears on the editor for moving the needle. The timeline bar above the editor cannot be used with touch. Double-tapping the touchthumb starts playback. Tap-and-drag activates cycling.
- The SEL ALL button is replaced by a SEL button, which opens a menu with options to select a part, play it in a loop, or stretch it.
 |
 |
 |
 |
Main window
- If the main window has a vertical scrollbar, place a finger anywhere on any mixer section and move it vertically to scroll all mixer sections.
Menus
- Tap outside a menu to close it.
Touch hardware and Windows versions
A tablet or convertible notebook (where the lid flips so the screen faces outward when closed) works well. Another good option is a touchscreen on a stand, connected to your computer. It's best if the screen is angled toward you.
The best experience comes from using a multi-touch screen. Multi-touch lets you use multiple fingers at once. The onscreen MIDI keyboard benefits from this, and two-finger zooming becomes available.
MultitrackStudio also works with single-touch screens or older versions of Windows. Be aware that resistive touchscreens (often found in older monitors) require more pressure and make finger-dragging difficult. These are not recommended, as they make faders, knobs, and editors hard to control.
Features not available in touchscreen mode
Some features aren't available in touchscreen mode. Most notably:- Labels aren't available.
- Collapsing mixer sections isn't possible. The buttons would get in the way, and the collapsed sections would be too small.
- The editors' Time Warp feature currently doesn't support touch.